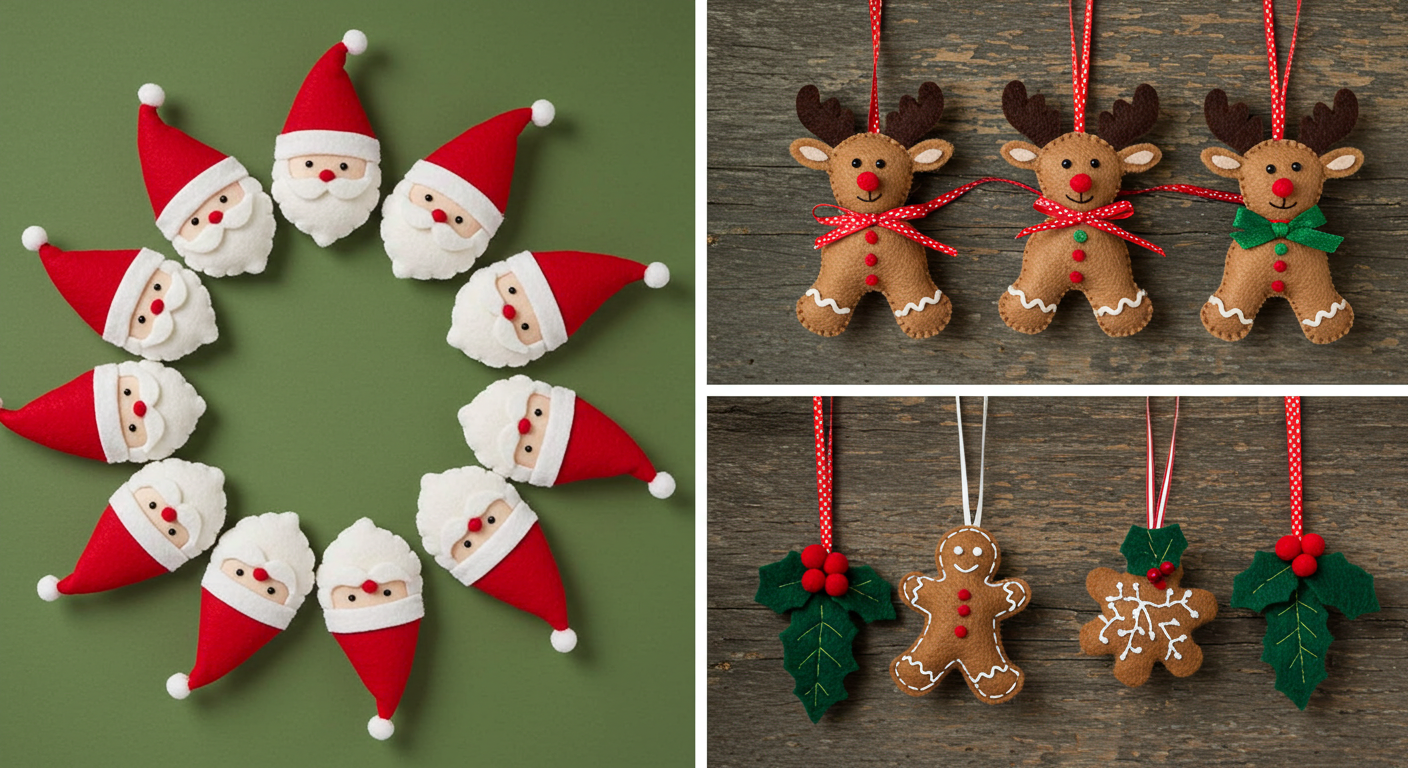
Creating your own felt Christmas ornaments is not only a cozy and enjoyable winter activity, but also a charming way to add a handmade touch to your holiday decor. Whether you’re crafting alone, with friends, or as a family activity, these felt ornaments bring warmth, creativity, and a personal sparkle to your Christmas tree. In this article, we will guide you through the process of making beautiful felt ornaments from scratch – complete with free templates, pattern ideas, and practical tips for perfect results.
Why Choose Felt for Christmas Ornaments?
Felt is one of the most versatile and beginner-friendly fabrics for crafting. It doesn’t fray, it comes in a wide range of colors, and it’s easy to cut and sew. These qualities make it perfect for small decorative items like tree ornaments. With just a few basic supplies, even sewing beginners can create professional-looking results.
Materials You Will Need
Before starting, make sure you have the following materials on hand:
- Felt sheets in various colors (preferably wool-blend or high-quality acrylic)
- Embroidery thread (matching or contrasting)
- Needle
- Scissors or rotary cutter
- Pins or fabric clips
- Stuffing (polyester fiberfill or cotton)
- Hot glue gun (optional)
- Ribbon, lace or twine (for hanging loops)
- Decorative elements like buttons, beads, sequins, bells
- Printable template or paper pattern (see below)
Step-by-Step Instructions for Making Felt Ornaments
Step 1: Choose a Template or Draw Your Own
You can find many free printable templates online or sketch your own designs. Popular shapes include:
- Christmas trees
- Stars
- Snowflakes
- Angels
- Mittens
- Gingerbread men
- Hearts
- Snowmen
Make sure to print the template at 100% scale or adjust to your desired ornament size.
Step 2: Cut Out the Felt Shapes
Pin your paper pattern to the felt or trace it with a fabric marker or tailor’s chalk. Carefully cut out two identical shapes per ornament (front and back) using sharp fabric scissors.
Step 3: Add Decorative Embellishments
Before sewing the two felt layers together, decorate the front piece. This could include:
- Embroidered snowflakes
- Sequins sewn on as “ornament balls”
- Mini buttons as eyes or noses
- Fabric paint accents
- Personalized initials with stitched letters
Pro tip: Less is more – clean designs with small details often look most professional.
Step 4: Stitch the Ornament
Place the front and back felt pieces together and begin stitching around the edges using a blanket stitch or whipstitch. Leave a small gap for stuffing.
Step 5: Stuff and Finish
Lightly stuff the ornament with fiberfill so it’s puffy but not overfilled. Close the gap with stitching. Attach a small loop of ribbon or twine at the top using a few secure stitches or hot glue.
Free Template Download
On fadenmagie.com, we’ve created a free downloadable template set including:
- Classic star
- Whimsical snowman
- Mini tree with layered felt
- Festive heart with scalloped edges
- Gingerbread man with face guides
You can print these on A4 paper and use them as reusable patterns year after year.
Creative Ideas and Variations
1. Scandinavian Minimalism
Stick to white, grey, and red felt. Embroider traditional Nordic patterns or hearts.
2. Kids’ Ornament Station
Let children draw their own ornament shapes, then help them cut and sew. Use safety needles and avoid small embellishments for very young children.
3. Themed Tree Decor
Make a whole set in a single theme: all stars in gold and white, or all forest animals in natural tones.
4. Scented Ornaments
Add a few drops of cinnamon or pine essential oil to the stuffing for a scented tree.
5. Personalized Ornaments
Stitch initials, names, or the year on the back. Great as gifts or keepsakes.
Tips for a Professional Finish
- Use high-quality felt: Wool-blend felt holds its shape better than thin craft felt.
- Pre-cut stuffing: Use small amounts of fiberfill and distribute it evenly.
- Use a thimble: Especially when sewing through multiple felt layers.
- Practice basic embroidery stitches: A simple backstitch or French knot can elevate your design.
- Keep colors balanced: Use no more than 3 colors per ornament to keep it elegant.
Sustainability and Gift Ideas
Handmade felt ornaments are a great way to move away from plastic decor. They can be:
- Reused for years
- Stored flat and safely
- Gifted as heartfelt presents
- Used as gift toppers, garlands, or napkin rings
Pair a set of ornaments with homemade cookies for a beautiful, low-waste Christmas gift.
Organizing a DIY Ornament Workshop
Hosting a felt ornament crafting session is a fun pre-Christmas activity. Whether in a school, church group, or with friends, you’ll need:
- Pre-printed templates
- Felt in different colors
- Sewing kits or glue
- Hot chocolate and Christmas music for atmosphere
Don’t forget to take photos of everyone’s creations!
Storage and Care Tips
- Store ornaments in a dry, airtight box
- Keep away from heat and moisture
- For dust removal, gently dab with a lint roller or soft brush
Conclusion
Creating felt Christmas ornaments is a joyful, meaningful, and artistic tradition that brings beauty into your home while honoring craftsmanship. With simple tools and heartfelt designs, even beginners can create decorations that look boutique-worthy. So gather your felt, thread your needle, and bring a little handmade magic to your Christmas tree.
For free templates, inspiration boards, and video tutorials, visit fadenmagie.com – your creative space for handmade wonders.

