
Ärmelschals sind nicht nur modische Accessoires, sondern auch wunderbar praktische Begleiter für kühlere Tage. Selbst einen Ärmelschal stricken ist ein tolles Projekt, das auch Anfänger mit etwas Geduld meistern können.
In dieser kostenlosen einfachen Anleitung zeigen wir Ihnen, wie Sie einen stilvollen und bequemen Ärmelschal selbst stricken können, der sowohl wärmt als auch Ihr Outfit aufwertet. Freuen Sie sich auf ein entspannendes und kreatives Strickerlebnis!
Hier sind einige Gründe, warum Sie dieses Strickprojekt lieben werden:
Dieser Ärmelschal ist einsteigerfreundlich und somit ideal für Strickanfänger, die ihre Fähigkeiten erweitern möchten.
Der fertige Ärmelschal ist nicht nur ein modisches Statement, sondern hält Sie auch an kühlen Tagen warm und gemütlich.
Der Ärmelschal ist vielseitig einsetzbar und kann zu verschiedenen Outfits getragen werden, ob lässig oder elegant.
Mit dieser kostenlosen Anleitung können Sie Ihren individuellen Ärmelschal stricken und dabei Ihrer Kreativität freien Lauf lassen.
Materialien für Ärmelschal stricken – kostenlose einfache Anleitung
Hier’s what you’ll need to create this beautiful sewing project:
The complete materials list, including measurements, is provided in the project details below.
Wie man einen Ärmelschal strickt – kostenlose einfache Anleitung

Follow these simple steps to create this beautiful sewing project:
Step 1: Maschen anschlagen
Schlagen Sie die gewünschte Anzahl an Maschen an. Die Anzahl hängt von der gewünschten Breite des Schals ab. Für einen lockeren Schal sind ca. 60-80 Maschen empfehlenswert. Achten Sie darauf, die Maschen nicht zu fest anzuschlagen.
Step 2: Grundmuster stricken
Stricken Sie das Grundmuster Ihrer Wahl. Für Anfänger eignet sich das Rippenmuster (1 Masche rechts, 1 Masche links im Wechsel) oder das kraus rechts Muster (jede Reihe rechte Maschen). Stricken Sie so lange, bis der Schal die gewünschte Länge erreicht hat. Denken Sie daran, dass der Schal lang genug sein sollte, um bequem um die Schultern gelegt werden zu können.
Step 3: Ärmelöffnungen stricken
Wenn der Schal ca. 50-60 cm lang ist (oder die gewünschte Länge für die erste Ärmelöffnung erreicht ist), teilen Sie die Maschen in der Mitte. Stricken Sie jede Seite separat weiter. Für die Ärmelöffnung lassen Sie auf jeder Seite ca. 10-15 Maschen stillliegen oder verwenden Sie einen Maschenhalter. Stricken Sie beide Seiten separat weiter, bis die Ärmelöffnungen die gewünschte Länge haben (ca. 20-25 cm).
Step 4: Maschen wieder verbinden
Verbinden Sie die Maschen wieder, indem Sie die stillgelegten Maschen beider Seiten wieder auf eine Nadel nehmen und zusammenstricken. Achten Sie darauf, dass die Maschen nicht verdreht sind. Stricken Sie den Schal im Grundmuster weiter, bis die zweite Ärmelöffnung erreicht ist. Wiederholen Sie Schritt 3, um die zweite Ärmelöffnung zu stricken.
Step 5: Schal fertigstellen
Stricken Sie den Schal weiter, bis er die gewünschte Gesamtlänge erreicht hat. Messen Sie den Schal regelmäßig, um sicherzustellen, dass er die richtige Länge hat. Ketteln Sie die Maschen locker ab. Schneiden Sie das Garn ab und ziehen Sie es durch die letzte Masche.
Step 6: Fäden vernähen
Vernähen Sie alle losen Fäden mit einer Wollnadel. Ziehen Sie die Fäden vorsichtig durch die Maschen auf der Rückseite des Schals, sodass sie nicht sichtbar sind. Schneiden Sie die überstehenden Fäden ab.
Pressen Sie Ihren fertigen Ärmelschal vorsichtig mit einem Bügeleisen (auf niedriger Stufe), um ihm ein professionelles Aussehen zu verleihen. Fertig ist Ihr selbstgestrickter Ärmelschal!
Perfecting the Sewing Process
For optimal results, begin by cutting all pattern pieces accurately. Then, sew the main seams, like shoulder and side seams. Add smaller elements, such as cuffs or collars, before finishing with hems and closures. This structured approach ensures a professional finish.
Add Your Personal Touch
Let your creativity flow! Experiment with different fabrics, from cozy fleece to elegant silk. Incorporate decorative stitches, embroidery, or appliques. Consider adding buttons, ribbons, or lace for a unique and personalized touch that reflects your style.
Caring for Your Creation
To keep your creation looking its best, hand wash or machine wash on a gentle cycle. Use a mild detergent and avoid bleach. Lay flat to dry or tumble dry on low heat. Iron on a low setting if needed, protecting delicate fabrics with a pressing cloth.
Use a walking foot for slippery fabrics to prevent them from shifting while sewing. This helps achieve even and accurate seams.
Always pre-wash your fabric to avoid shrinkage after your garment is completed. This simple step saves you from frustration later.
Press seams as you go to give your project a professional and polished look. Neat seams elevate the overall quality.
(Personal anecdote formated as paragraph subheading)
I still remember the first Ärmelschal I made. My sister absolutely loved it and wore it to a winter wedding. It was so rewarding to see something I made being appreciated and admired!
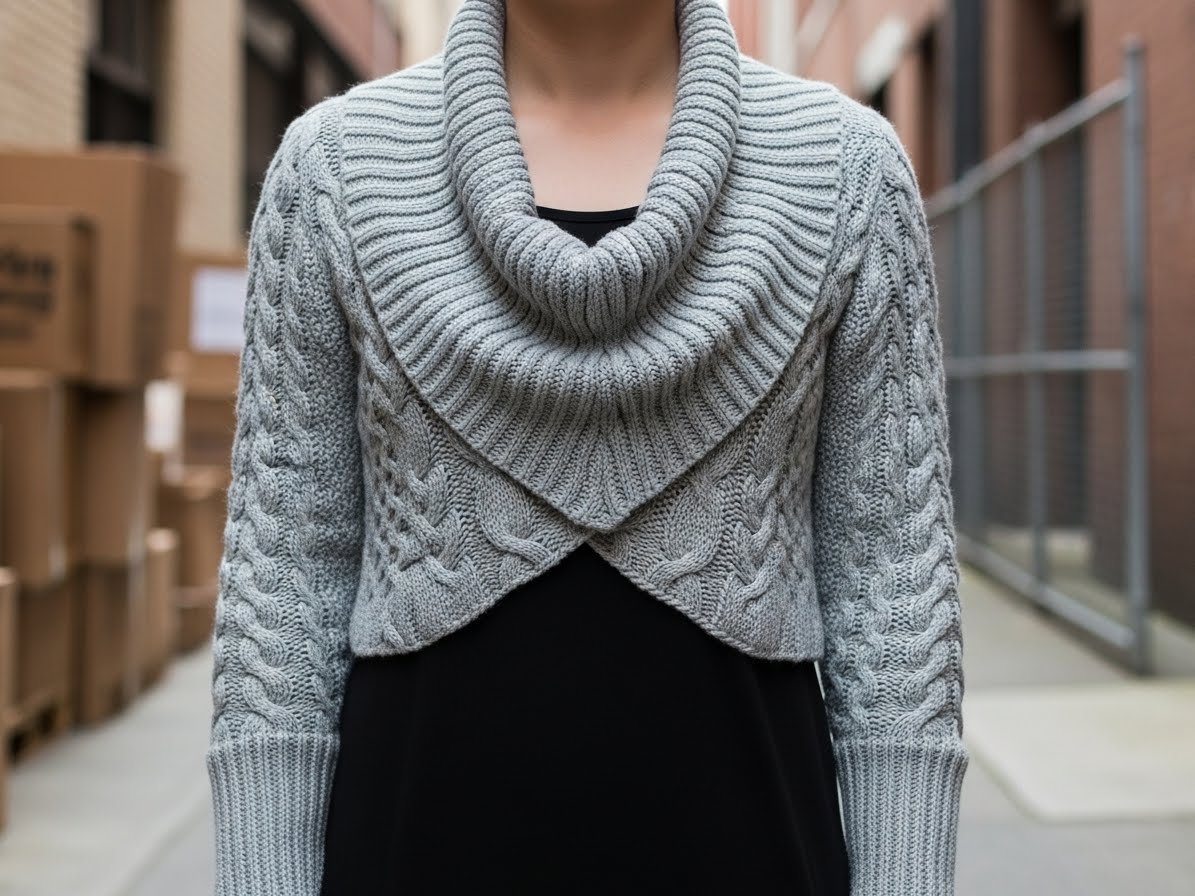
Understanding the Ärmelschal Pattern
An Ärmelschal, or sleeve scarf, is a unique garment combining the warmth of a scarf with the practicality of sleeves. Essentially, it’s a long scarf with openings to insert your arms, providing both neck and arm coverage. This project, “Ärmelschal stricken – kostenlose einfache Anleitung,” focuses on creating a simple yet stylish version. We will guide you through selecting appropriate materials and understanding the basic construction. The pattern is adaptable, allowing you to customize the length, width, and yarn type to suit your preferences. Whether you are an experienced knitter or a curious beginner, this guide provides you with a solid foundation to create your personalized Ärmelschal.
Key Features of the Ärmelschal
The beauty of an Ärmelschal lies in its versatility. It can be worn in numerous ways, draped elegantly over the shoulders, wrapped snugly around the neck, or even belted for a more fitted look. The sleeve openings allow for freedom of movement while keeping your arms warm. Unlike a traditional scarf, it stays in place, making it perfect for outdoor activities or busy days. The ease of knitting makes it a satisfying project for all skill levels. This free and simple guide will help you craft a functional and fashionable accessory.
Gathering Your Materials
Before you begin your knitting project, gather all necessary materials. This will ensure a smooth and enjoyable crafting experience. The materials you will need include yarn, knitting needles, scissors, and a tapestry needle.
Selecting the Right Yarn
Choosing the right yarn is crucial for the success of your Ärmelschal. Consider the fiber content, weight, and color. For warmth and softness, opt for wool, cashmere, or alpaca blends. Acrylic yarns are a more affordable and easy-care option. The yarn weight will determine the gauge, so choose a weight that matches the pattern instructions. For a lightweight Ärmelschal, use a DK or worsted weight yarn. For a bulkier, cozier feel, go for chunky or bulky yarn.
Yarn Color Considerations
The color of your yarn will greatly impact the overall look of your Ärmelschal. Choose a color that complements your wardrobe and personal style. Neutral colors like gray, beige, and navy are versatile and easy to pair with different outfits. Bold colors like red, teal, or mustard can make a statement. Consider using variegated or self-striping yarn for added visual interest.
Choosing Your Knitting Needles
The size of your knitting needles will depend on the yarn weight you have chosen. The yarn label will usually recommend a needle size. As a general guideline, use larger needles for thicker yarns and smaller needles for thinner yarns. Straight needles are suitable for this project, but circular needles can also be used if you prefer. Ensure that your needles are comfortable to hold and allow the yarn to glide smoothly.
Knitting Techniques for the Ärmelschal
This Ärmelschal pattern utilizes basic knitting techniques that are easy to learn and master. These techniques include casting on, knit stitch, purl stitch (optional, depending on your desired texture), and casting off. Mastering these basic techniques is essential for a successful outcome.
Casting On
Casting on is the first step in any knitting project. It creates the initial row of stitches on your needle. There are several methods for casting on, but the long-tail cast-on is a popular choice for its neat and stretchy edge. Practice your cast-on technique to ensure an even and consistent edge.
Knit Stitch
The knit stitch is the most fundamental stitch in knitting. It creates a smooth, V-shaped fabric. To knit stitch, insert the right needle into the front of the first stitch on the left needle. Wrap the yarn around the right needle and pull it through the stitch. Slip the stitch off the left needle. Repeat this process for each stitch in the row.
Purl Stitch (Optional)
The purl stitch is the reverse of the knit stitch and creates a textured, bumpy fabric. To purl stitch, insert the right needle into the back of the first stitch on the left needle. Wrap the yarn around the right needle and pull it through the stitch. Slip the stitch off the left needle. You can use purl stitches to create ribbing or other textured patterns.
Casting Off
Casting off, also known as binding off, is the final step in your knitting project. It secures the stitches and prevents them from unraveling. To cast off, knit two stitches. Then, use the left needle to lift the first stitch over the second stitch and off the needle. Knit one more stitch and repeat the process until only one stitch remains on the needle. Cut the yarn, leaving a tail, and pull the tail through the last stitch to secure it.
Step-by-Step Knitting Instructions
Follow these step-by-step instructions to create your own beautiful Ärmelschal. The process is straightforward, making it accessible even for beginners. Take your time and enjoy the process.
Creating the Scarf Body
1. Cast on the desired number of stitches based on your preferred width. A typical width for an Ärmelschal is around 12-16 inches.
2. Knit every row (garter stitch) until the scarf reaches your desired length, minus the length needed for both armholes. A standard length is around 60-70 inches, but feel free to adjust.
3. Mark the locations for the armholes. Use stitch markers to note where you want the arm openings.
4. Bind off the number of stitches needed for each armhole. The size depends on your preference, but a common size is 6-8 inches.
5. Cast on the same number of stitches you bound off in the previous step to bridge the armhole gap.
6. Continue knitting until the scarf reaches the desired total length.
7. Bind off all remaining stitches.
Finishing Touches
Weave in all loose ends using a tapestry needle. This will create a neat and professional finish. Block your Ärmelschal to even out the stitches and enhance its drape. Blocking involves gently washing or steaming your finished project and then laying it flat to dry in the desired shape.
Customization and Variations
One of the best things about knitting is the ability to customize your projects. Here are some ideas for adding your personal touch to your Ärmelschal.
Adding Texture and Patterns
Experiment with different stitch patterns to add texture and visual interest to your Ärmelschal. Consider incorporating ribbing, cables, or lace patterns. You can also alternate between knit and purl stitches to create textured stripes or geometric designs.
Playing with Color
Use different colors to create stripes, color blocks, or gradient effects. You can also add contrasting edgings or embellishments. Consider using scrap yarn to create a colorful, scrappy Ärmelschal.
Adding Embellishments
Add buttons, beads, or tassels to your Ärmelschal for extra flair. You can also attach fringe or pom-poms to the ends. Experiment with different embellishments to create a unique and personalized look.
(Personal anecdote formated as paragraph subheading)
Once, I used a beautiful variegated yarn for an Ärmelschal, and the color changes created such a stunning effect. It looked like a piece of art!
Conclusion for Ärmelschal stricken – kostenlose einfache Anleitung
Das Ärmelschal stricken ist ein wunderbar einfaches Projekt, um sich selbst etwas Schönes zu schaffen oder ein liebevolles Geschenk anzufertigen. Mit der richtigen Stoffauswahl, den passenden Maßen und ein paar grundlegenden Nähkenntnissen können auch Anfänger schnell Erfolge erzielen. Ob aus wärmendem Fleece für kalte Tage oder aus leichter Viskose für den Übergang – der Ärmelschal ist ein vielseitiges Accessoire. Lassen Sie Ihrer Kreativität freien Lauf und personalisieren Sie Ihren Schal mit individuellen Details. Viel Spaß beim Stricken!
FAQs
Welche Stoffe eignen sich am besten für einen Ärmelschal?
Für einen Ärmelschal sind weiche, fließende Stoffe ideal. Strickstoffe wie Jersey, leichter Sweat oder Fleece bieten Wärme und Komfort. Leichte Wollstoffe oder Viskose sind ebenfalls gute Optionen, da sie schön fallen und sich angenehm tragen lassen. Achten Sie darauf, dass der Stoff nicht zu dick ist, damit der Ärmelschal nicht zu voluminös wird. Berücksichtigen Sie auch die Dehnbarkeit des Stoffes, besonders wenn Sie einen enganliegenden Ärmelschal planen. Testen Sie am besten verschiedene Stoffe, um den perfekten für Ihr Projekt zu finden.
Wie messe ich richtig für meinen Ärmelschal?
Messen Sie zuerst Ihren Oberarmumfang an der Stelle, an der der Ärmel sitzen soll. Addieren Sie ein paar Zentimeter für Bewegungsfreiheit und Nahtzugabe. Messen Sie dann die gewünschte Länge des Ärmelschals, vom Oberarm bis zum Handgelenk oder wo immer er enden soll. Auch hier sollten Sie Nahtzugabe berücksichtigen. Wenn Sie möchten, dass der Ärmelschal locker sitzt, fügen Sie noch etwas mehr Weite hinzu. Es ist ratsam, zuerst ein Probestück aus einem ähnlichen Stoff zu nähen, um die Passform zu überprüfen und gegebenenfalls Anpassungen vorzunehmen.
Welche Nähmaschine ist am besten geeignet, um einen Ärmelschal zu nähen?
Eine herkömmliche Haushaltsnähmaschine ist völlig ausreichend, um einen Ärmelschal zu nähen. Für Strickstoffe ist ein Jerseystich oder ein Zickzackstich empfehlenswert, um zu verhindern, dass sich die Nähte dehnen und reißen. Wenn Sie eine Overlockmaschine besitzen, können Sie damit die Kanten versäubern und gleichzeitig zusammennähen, was Zeit spart und ein professionelleres Ergebnis liefert. Achten Sie darauf, die richtige Nadel für den gewählten Stoff zu verwenden – eine Jerseynadel verhindert Laufmaschen bei Strickstoffen. Üben Sie am besten vorher auf einem Stoffrest, um die Einstellungen Ihrer Maschine zu optimieren.
Wie kann ich meinen selbstgestrickten Ärmelschal personalisieren?
Es gibt viele Möglichkeiten, Ihren selbstgestrickten Ärmelschal zu personalisieren. Sie können verschiedene Strickmuster ausprobieren, beispielsweise Zopfmuster, Rippenmuster oder Ajourmuster. Farbverläufe durch den Einsatz unterschiedlicher Garnfarben sind ebenfalls eine schöne Option. Fügen Sie dekorative Elemente wie Knöpfe, Perlen, Fransen oder Bommel hinzu, um den Schal aufzupeppen. Auch Stickereien oder Applikationen können den Ärmelschal einzigartig machen. Denken Sie darüber nach, welche Farben und Muster am besten zu Ihrem Stil passen und lassen Sie Ihrer Kreativität freien Lauf.